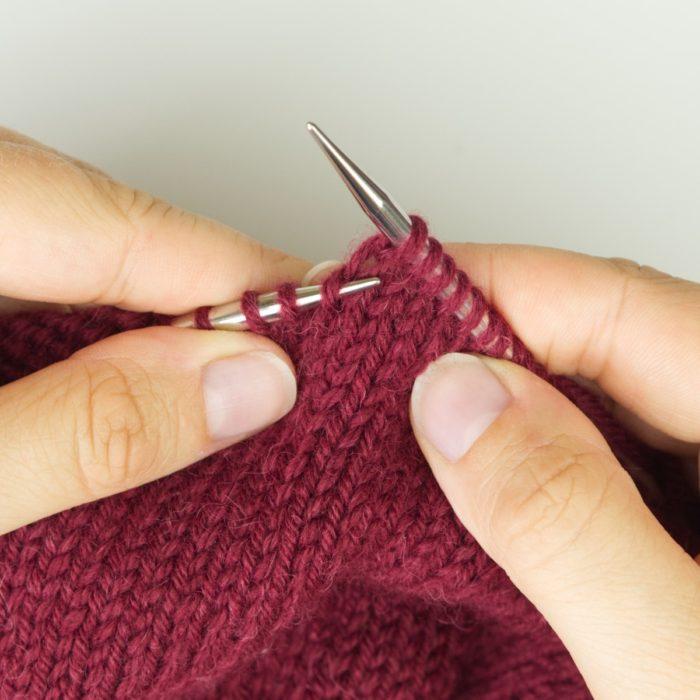
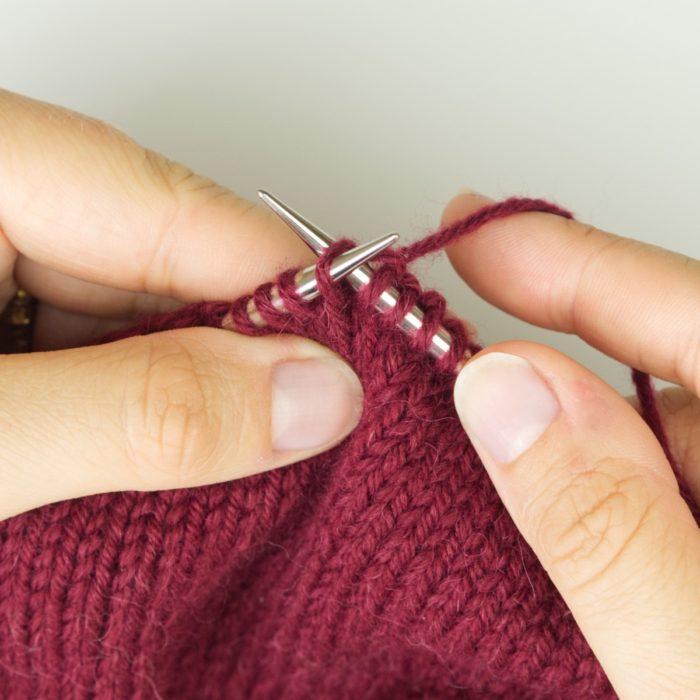
Lifted increases create a neat increase with no holes. They are created from the stitch below, so they can easily used in place of a make one increase e.g. m1r, m1l, m1a, m1t.
Lifted increases can be created in mirrored pairs – the left-lifted increase (LLI) and the right-lifted increase (RLI).
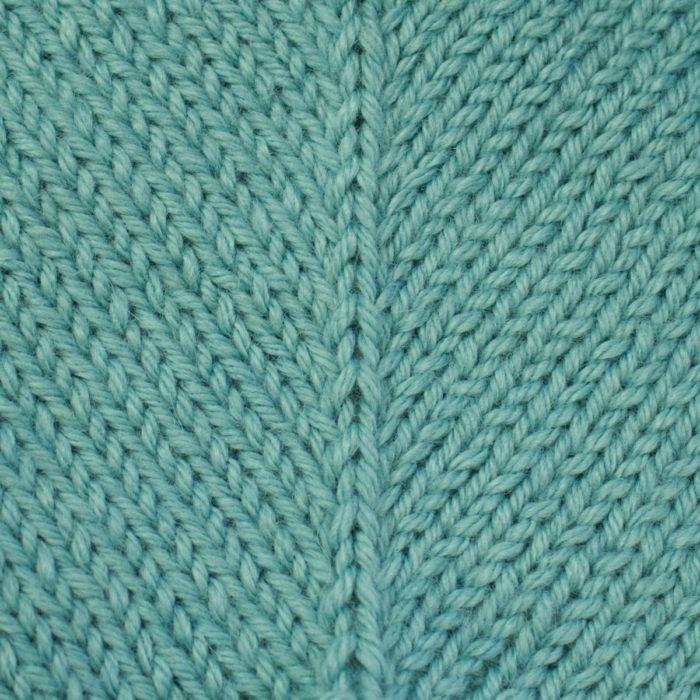
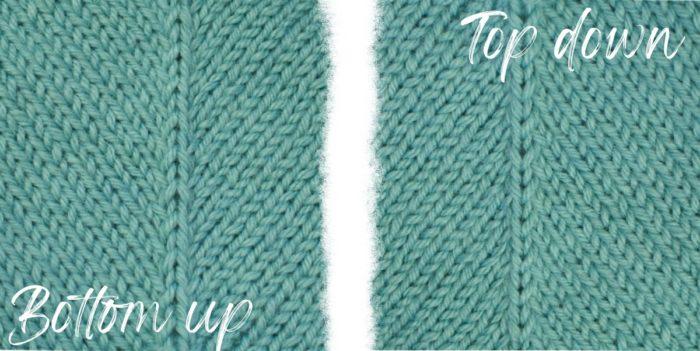
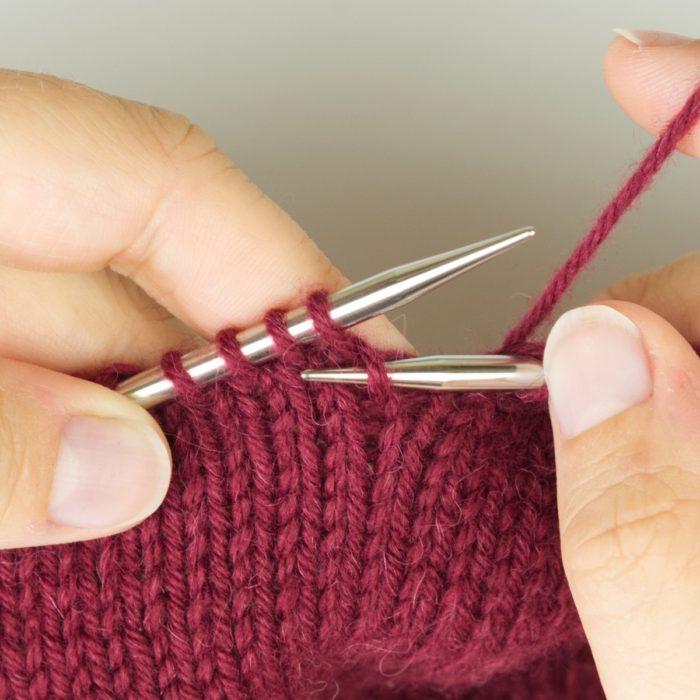
They can look quite different depending on which order that they are worked in.
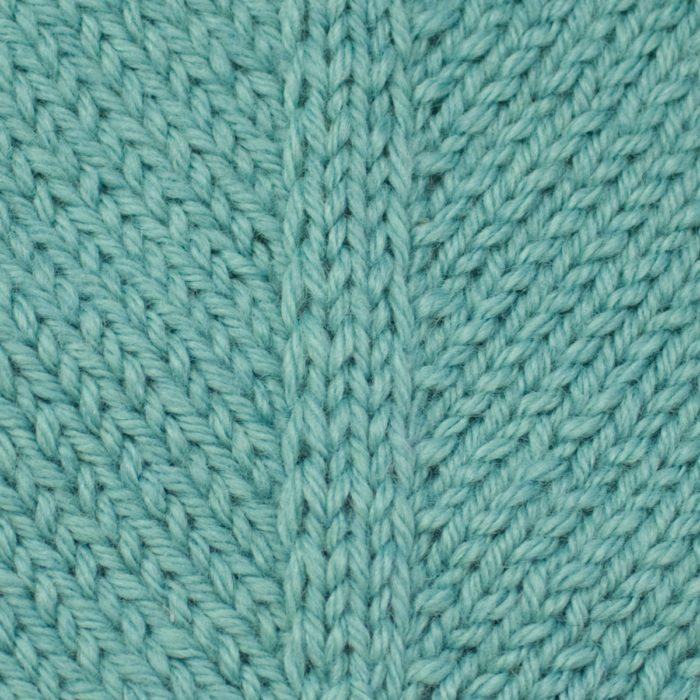
LLI, k2, RLI
RLI, k2, LLI
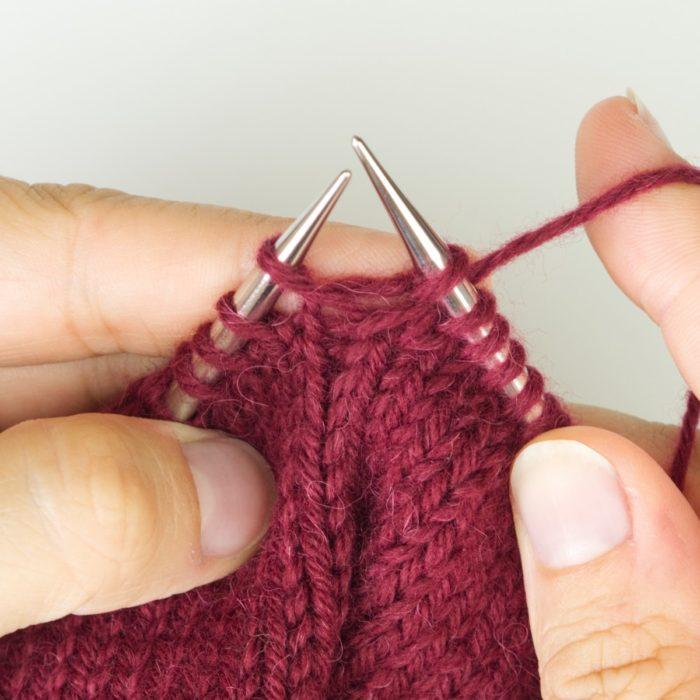
The RLI, k2, LLI has an added benefit of working particularly well when seen from upside down. This makes it ideal for top down garments, as it looks like a knit column from top down.
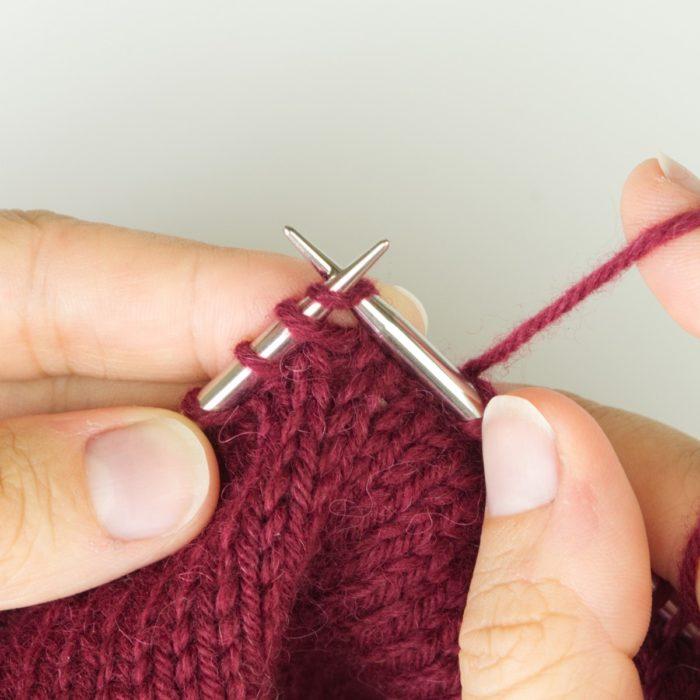
They work best when there are plain rows worked between the increase rows, as it’s only possible to create a lifted increase on subsequent rows if they are worked in the order LLI then RLI. If you try to work them RLI then LLI on subsequent rows, you will be working into the same stitch each time and it just won’t work.
We use cookies to optimise our website and our service.
Functional
Always active
The technical storage or access is strictly necessary for the legitimate purpose of enabling the use of a specific service explicitly requested by the subscriber or user, or for the sole purpose of carrying out the transmission of a communication over an electronic communications network.
Preferences
The technical storage or access is necessary for the legitimate purpose of storing preferences that are not requested by the subscriber or user.
Statistics
The technical storage or access that is used exclusively for statistical purposes.The technical storage or access that is used exclusively for anonymous statistical purposes. Without a subpoena, voluntary compliance on the part of your Internet Service Provider, or additional records from a third party, information stored or retrieved for this purpose alone cannot usually be used to identify you.
Marketing
The technical storage or access is required to create user profiles to send advertising, or to track the user on a website or across several websites for similar marketing purposes.